
Watch the walkthrough: Loom: How to Create and Use Groups
What you needYou need the Manager or Admin role. You have it if either of these is true:
- You see Admin in the top navigation.
- Your profile menu, then Settings, then Account Settings, takes you into the admin area.
If you do not see the admin area, you cannot manage groups.
What groups are forGroups are logical buckets of members. Use them to assign content, track progress, and manage members in bulk. They work like an Organizational Unit in Active Directory or Entra. The interface uses "groups" and "teams" interchangeably.
A member can belong to several groups at once, and groups can overlap. For example, you can have a Help Desk group alongside Level 1, Level 2, and Level 3 groups.
Open the Groups page- Click Admin.
- In the left-hand menu, select Groups.
The page lists every group in your tenant. Empath creates an All group automatically and keeps it updated with every provisioned license.
Do not rename All. Renaming it breaks the link to the automatic membership, and Empath creates a new All group.
Create a group- On the Groups page, click Create.
- Enter a name.
- Optional: choose a color to make the group easy to spot.
- Optional: add a description.
- Click Create.
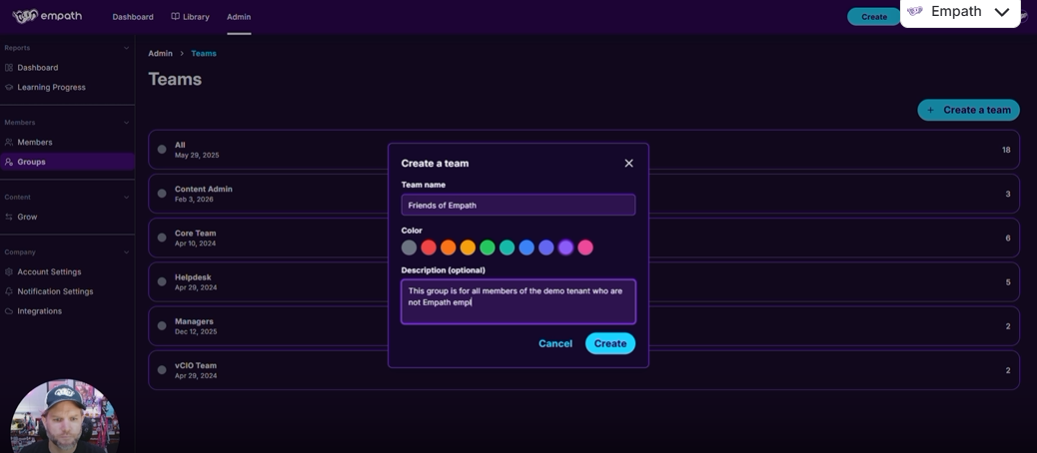
The group appears in the list with its color and name. A new group has no members.
Add members to a group- Open the group.
- Click Add Members.
- Select one or more members in the picker.
- Confirm to add them.
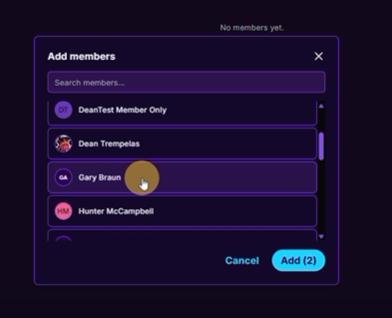
A member who is already in the group cannot be added to it again.
If the person is not in Empath yet, add them as a member first: How to Add or Remove Members in Empath.
To take someone out, open the group and use Remove next to them.
Add or remove a group from a member's recordYou can also manage membership from the member instead of from the group.
- Go to Admin, then Members.
- Open the member.
- Click the ellipsis menu and choose Edit Groups.
- Add or remove groups.
The member's details view lists the groups they belong to. Edit Groups is also available from the member's account settings.
Rename or delete a groupOpen the group and choose Rename or Delete. Deleting a group removes the group only. The members in it stay in your tenant.
Filter reports by group- In the admin area, open Consumption Reporting or Learning Progress.
- Change the people filter from All People to the group you want.
- Set any other filters you need, such as the time period.
Exports follow the filters you set. With a group selected, the CSV download covers that group.
In Learning Progress, you can narrow further. For example, filter to pathways to see how a group is progressing on a pathway you assigned to it.
Assign a course to a groupAssigning a course sends an email to everyone in the group.
- Choose Assign Course on the course.
- Select the group as the audience.
- Set a due date.
- Click Assign Course.
Everyone in the group receives the assignment.
Roles act as groups in other admin settingsContent Admin and Manager show up as groups in other parts of the admin area, whether or not you created matching groups on the Groups page. In Notification Settings, for example, you can target Managers and Admins or Team Members only. This is role-based targeting. Changes to groups on the Groups page do not affect it.
Groups do not grant or inherit permissions.
Get helpIf someone in your organization can access Empath, use the in-app chat bubble (the question mark icon) to open a support request. If you cannot access Empath at all, email support@empathmsp.com.
Include the affected member's email, what you tried, what you expected, what happened, and a screenshot or recording.